After determining where to install the flush mount, I put down painter’s tape. The tape allowed me to mark the location of the mount, and the holes. You can flip the mount over, and use it a template. Scribe around it with a pencil, and then draw two diagonals . Where they intersect is the center of the 1 3/8″ hole.
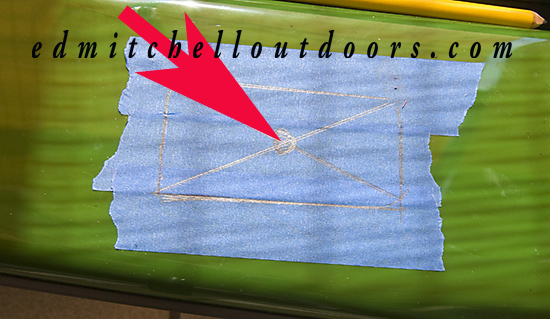
The arrow points to the center of the 1 3/8″ hole
I couldn’t find a fine toothed hole saw. But one I had did the trick, although it left a bur around the hole. I cleaned it off with a knife. The 1 3/8″ hole saw had an outside diameter of 1.35″ exactly like the mount’s well. So a tight fit was assured. If you can’t get a tight fit, you may want to apply a layer of chalk under the mount before you secure it down.
To assist the hole saw, I first drilled a small 7/64″ pilot hole. Best to go slow with the hole saw and not apply heavy down pressure. Take your time. Once you finish the hole, marking the 4 holes for the rivets is a piece of cake. These holes need to be 3/16″, but starting with a small pilot is not a bad idea.
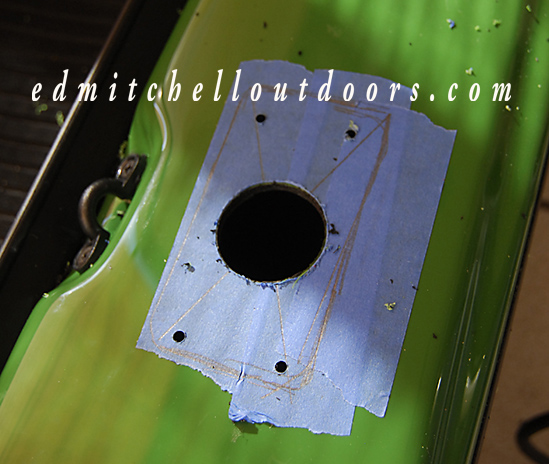
Holes drilled