
The $800 Coosa Board has Arrived
Okay, onward with the rescue. In the Part Four, we began the process of building a new transom. Yesterday, with the Coosa board finally on hand, we made a good deal of progress. The Coosa will become the solid, strong core of the transom. But before it can be the core, it had to be cut to properly fit. Now this Coosa board is worth close to $800, so we had to be accurate the first time. To do that, we began by making a simple cardboard template of the transom core. Obviously, unlike the 1.5″ thick Coosa, this cardboard template is quite thin and therefore can not fully reveal the true finished shape of the core.
The Cardboard Template being transferred to the foam
The next the step was to transfer the cardboard template to a 1.5″ sheet of foam insulation. Once cut out, we tried it in the hull. As we expected the foam template didn’t fit snuggly in place. For one thing it revealed that both the port and starboard sides of the template needed to be extensively bull nosed. So we shaped the foam template to better fit, checking several times.
The Foam Template being transferred to the Coosa board
When done, we had a very good idea how to cut the Coosa. So the foam template was traced onto the Coosa board. Then a jigsaw was used to carefully cut the Coosa. The resulting Coosa core was then placed in the hull to check for fit. As the foam had shown us, both port and starboard sides required bull nosing. We did the adjusting very slowly, constantly checking to get the best possible fit, realizing that any small gaps could later be filled with epoxy resin.

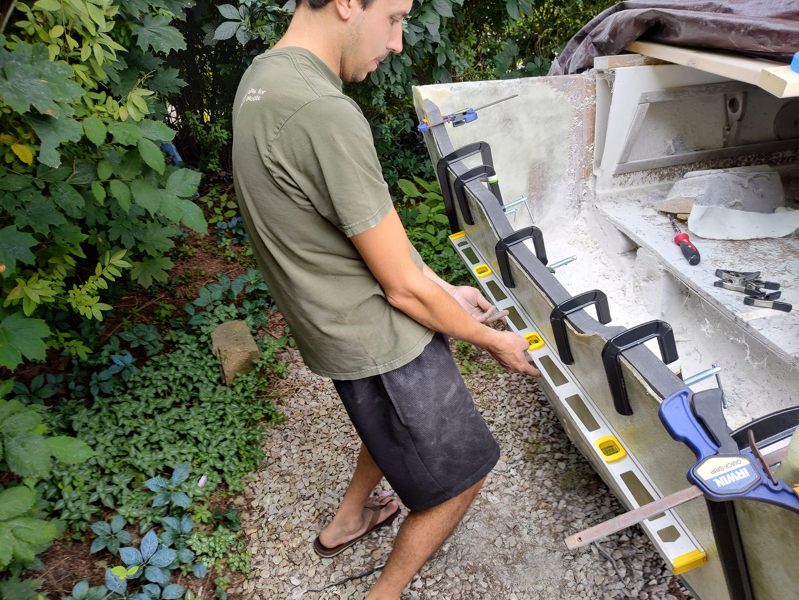
My son checking the Coosa for Fit
Once we were satisfied, the inside face of the Coosa (the one that would eventually face the engine) was painted with epoxy resin. A piece of fiberglass cloth was then cut to fit that face and squeegeed into place and coated with more epoxy. Then the Coosa core with wet fiberglass cloth was firmly clamped into position and left to dry. Looking good!
Double checking inside and out
If you wish to see the previous post use the links below
Part One Part Two Part Three Part Four